
One of the main reasons people shy away from hand therapy is splinting. You might think you’re not artistic enough or able to craft a good looking splint, but like anything, you become skilled with practice.
Splinting without patterns is achieved with practice, visualization, and understanding the purpose of the splint.
If you want to learn how to splint without patterns definitely check out my book where I walk you through the most common hand splints.
Splinting without patterns for Hand Therapists
Why you should splint without patterns
Splinting without patterns is all about making you more efficient and faster. When you use a pattern, you waste valuable time cutting out a pattern, drawing a pattern, and matching it to the size of your patient’s hand.
When you don’t have a pattern, you focus on the purpose rather than the aesthetics, but with time the aesthetics improve.
Visualization
I’m not an artist, but I can splint, and it only took a few days to become proficient.
When you splint with patterns you don’t visualize the final product. Instead, you rely on a pattern and splint accordingly. This takes time and results in error, because every hand size is different.
Splinting without patterns is about visualization. Instead of focusing on how to copy the pattern, you visualize the end product, and what it will prevent.
Try to visualize the splint and also the function of the splint. When you start thinking this way, you no longer need to rely on patterns.
In my ebook, I provide you with one basic pattern for all your splints that’s easy to memorize.
Practice splinting

Visualization is great, but it’s not enough. You need practice to become proficient and master this skill.
Start by practicing with cardboard, cloth, or get a small piece of splint material. After you’ve mastered splinting with cardboard, buy splint material and practice the 3 most common splints (wrist cockup, tip protector, and thumb spica).
The more you practice, the more fast and confident you’ll become.
Splinting isn’t like learning the piano that takes months or years to master. You should be able to master the 10 basic splints in a few hours. I would recommend practicing 3 hours a day for 3-4 days.
You’ll also get better at splinting by watching other people splint. Every hand therapist has a different technique that works for them, and the more you learn from others, the more you’ll know what works for you.
Understand the purpose of the splint
When you focus on the purpose of a splint, you’ll have a better understanding of where to cut, shape, and modify the splint. Sometimes experience helps with this. For example, I didn’t become better at splinting until I failed a few times.
Sometimes I’d make a splint for a patient, and 1-2 days later they would complain of discomfort. That’s why it’s always best to ask about splint comfort every time you see your patient.
After time, I was able to remediate these problems by making a simple splint modification or adjust a strap.
Creases
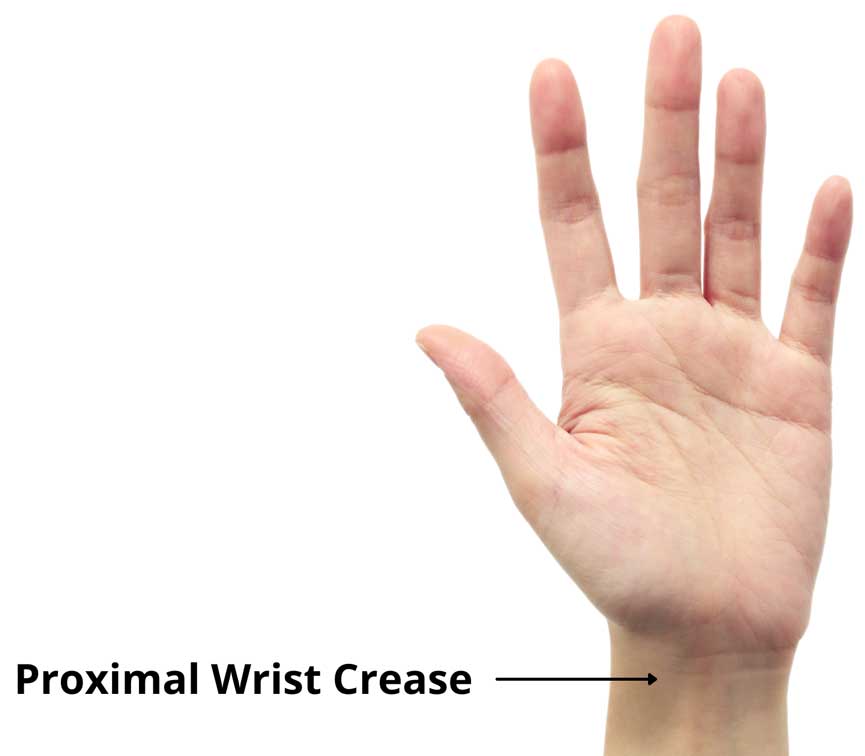
Creases are important in splinting because they help you know where to splint to incorporate function. If you love patterns, think of the hand creases as the pattern you need for splinting.
Creases also help you know where to cut to allow free movement. For example, if you cut out an area around the thenar eminence, the thumb will be able to flex and oppose.
Learn more about creases for hand therapy here.
Conclusion
Splinting without patterns is all about understanding one simple pattern for all patterns. My new book is all about how to use this general idea for any type of splint.
I hope you found this article helpful. Please subscribe below to learn other tips and tricks related to hand therapy.

David is the lead editor of OT Focus. He has been practicing as an Occupational Therapist since 2013. He specializes in acute care, hand therapy, and ergonomics.

![How to reduce hand swelling [Hand Therapy basics]](https://otfocus.com/wp-content/uploads/2021/03/How-to-reduce-hand-swelling-1024x576.jpg)