
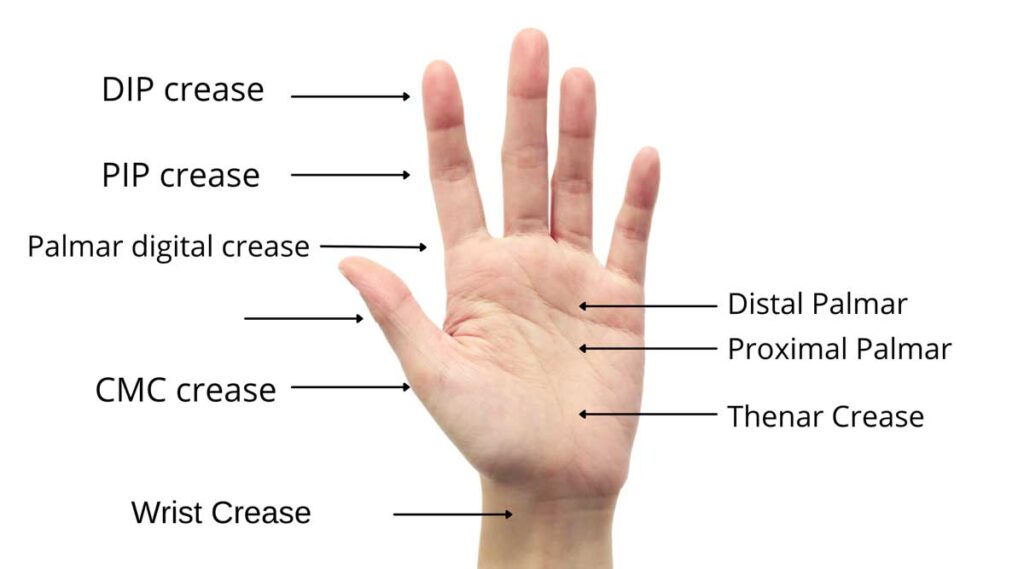
If you’re a hand therapist, you need to know your hand creases. Creases make splints more functional, and they’re helpful to include in your documentation.
The 5 creases every hand therapist should know include
- Distal palmer crease
- Proximal palmer crease
- Thenar Crease
- Wrist crease
- MP and IP crease
These are the basic wrist creases. Click below to download a free PDF.
In addition there are 3 wrist creases, 2 borders (radial and ulnar), and sometimes the MP or MCP crease is called the palmar digital crease.
Splinting and hand creases
Discussing hand creases is important, because the creases of the hand will help you splint without patterns.
If you want to learn how to splint without patterns read my book here.
When splinting, you should always splint while maintaining function. If you want to immobilize the wrist but maintain function of the thumb, the thenar crease should not be splinted.
The same goes for the other creases.
For example, if you’re fabricating a wrist cockup splint, the thumb and MP joints should be able to move freely. If these joints do not move freely, your patient may feel pain, discomfort, or develop skin breakdown.
The wrist crease
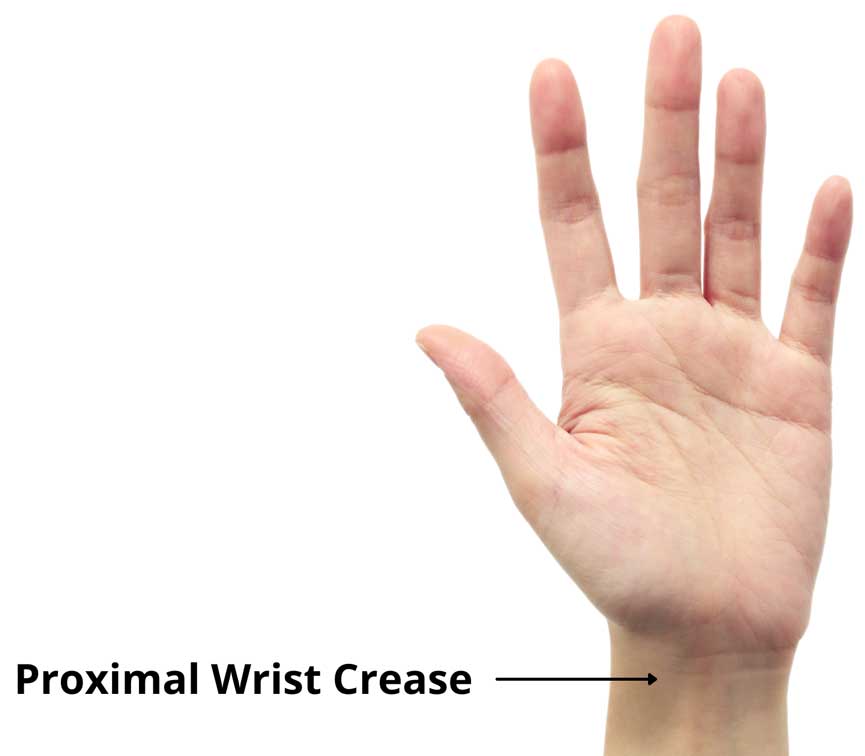
There are 3 creases at the wrist. This is important because if you are splinting the elbow but want the wrist to move freely, you should splint below the most proximal wrist crease.
The most proximal wrist crease allows for 90 degrees of wrist flexion, so splinting below it allows full ROM of the wrist.
Documenting hand creases
In you do hand therapy documentation, at times you will need to identify important areas of the hand by using the relevant crease.
You might say, “Patient was splinted below the distal palmer crease to allow functional movement of the MP joints.”
You might also document creases when splinting to show that you attempted to reduce pressure or skin breakdown.
Conclusion
The creases of the hand are the landmarks for splinting. They give you a guide to know where to splint and they can be helpful for documentation.
I hope this article was helpful. Don’t forget to read my book on splinting without patterns.
And consider subscribing below to learn more OT tips.

David is the lead editor of OT Focus. He has been practicing as an Occupational Therapist since 2013. He specializes in acute care, hand therapy, and ergonomics.

![How to reduce hand swelling [Hand Therapy basics]](https://otfocus.com/wp-content/uploads/2021/03/How-to-reduce-hand-swelling-1024x576.jpg)